Box Elder Maple Bonsai: Tips for Growing & Shaping Success
- July 31, 2025
- By Wayne Ridge
I’ve always been drawn to the unique character of trees, and the box elder maple, or “Acer negundo”, is no exception. While sometimes overlooked, this tree offers a fantastic opportunity for bonsai enthusiasts looking for something a bit different. Its adaptability and willingness to respond to care make it a rewarding subject for shaping into a miniature masterpiece. In this guide, I’ll share my experiences and tips for growing and shaping your box elder bonsai.
Key Takeaways
- The box elder maple, known botanically as *Acer negundo*, is an often-underestimated species for bonsai due to its common perception as a ‘trash tree’.
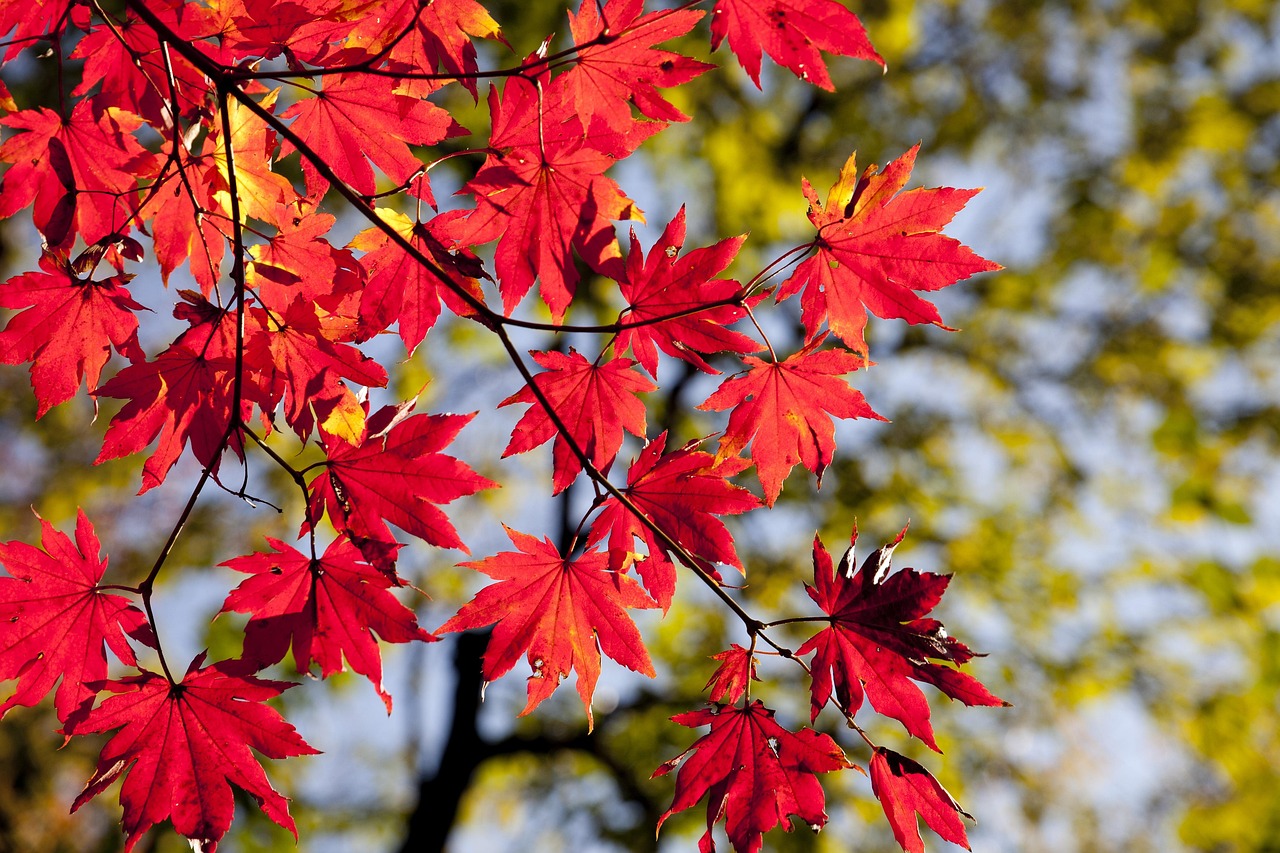
- Despite its reputation, the box elder maple possesses traits that make it well-suited for bonsai, including naturally small, three-lobed leaves that are easily reduced further.
- This species is quite forgiving and can tolerate conditions that might challenge other maple varieties, making it a good choice for beginners.
- Successful box elder bonsai cultivation involves understanding its specific needs for sunlight, water, and soil, much like any other bonsai subject.
- Consistent care, including timely pruning, repotting, and wiring, is vital for developing a well-shaped and healthy box elder bonsai over time.
What Is a Box Elder Maple Bonsai? Overview and Key Traits
When I first got into bonsai, I admit, the box elder maple wasn’t the first tree that came to mind. Often called the ash-leaf maple, it’s sometimes seen as a common, almost overlooked tree. However, I’ve found that the box elder maple bonsai, or Acer negundo, has a surprising amount of potential for the patient grower. It’s native to North and Central America and can handle climates that might be too warm or dry for other maples. This adaptability makes it a really interesting choice for bonsai.
Key Traits of the Box Elder Maple Bonsai
While it might not have the showy flowers or dramatic fall color of some other maples, the box elder has its own unique appeal. Its leaves are naturally small, which is a big plus for bonsai, and they can be made even smaller with proper care. It also tends to grow quickly, which means you can see progress in your training relatively fast.
- Adaptability: Thrives in a range of conditions, including heat and drier soils.
- Leaf Size: Naturally small leaves that are easily reduced further.
- Growth Habit: Vigorous growth allows for faster development.
- Versatility: Can be styled in various ways, from informal upright to cascade.
Why Choose Box Elder for Bonsai?
I’ve learned that this tree is quite forgiving, which is great when you’re still figuring things out. It doesn’t demand overly specific conditions, and it responds well to pruning and wiring. The ability to develop a full, well-shaped crown relatively quickly is one of its most attractive features for bonsai enthusiasts. It’s a good option if you’re looking to create a mature-looking bonsai without waiting decades.
While some might dismiss it as a “weed tree,” I see its resilience and rapid growth as advantages for creating compelling bonsai forms. Its unique leaf structure, often with three lobes, gives it a distinct look that can be quite striking when styled properly.
Growing Box Elder Seeds
If you’re starting from scratch, collecting box elder seeds in the fall is a straightforward process. You’ll want to look for mature seeds that have turned brown. After harvesting, it’s best to dry them and store them in a cool, dry place. Most box elder seeds need a period of cold stratification to germinate, mimicking natural winter conditions. Planting them in well-draining soil at the right time of year is key to getting them to sprout successfully. Young seedlings will need consistent watering and protection as they establish.
Choosing the Right Box Elder Seedling or Nursery Stock
When I started looking into growing box elder maple as bonsai, the first thing I had to figure out was where to get a good starting tree. It’s not like you can just walk into any nursery and find a box elder specifically cultivated for bonsai. Most of the time, you’re looking at either collecting from the wild or buying nursery stock that hasn’t been styled yet.
Collecting from the Wild
This is where you can find some really interesting material, especially if you know where to look. Box elders are pretty common, often found along streambanks or in disturbed areas. They grow fast, which is good for bonsai development, but they can also be a bit… unrefined. When you collect a wild tree, it often looks like little more than a stick in a pot, maybe with a trunk chop already done. You’re starting with a blank slate, which can be exciting but also means a lot of work ahead.
Buying Nursery Stock
If collecting isn’t your thing, you can buy box elders from regular nurseries. These are usually young trees, maybe a few years old. The key here is to look for potential. I try to find a trunk with some character, maybe a bit of movement or a nice taper, even if it’s just a straight stick at this stage. You’ll want to check the roots too, if possible. A good, healthy root system is going to make all the difference later on.
What to Look For
No matter where you get your box elder, there are a few things I always keep an eye out for:
- Trunk: Look for a trunk that has some thickness and maybe a bit of taper. A straight trunk can be worked on, but one with some natural bend or twist is often a better starting point.
- Roots: If you can see the root flare, that’s a bonus. A good nebari, or surface root system, is something you build over time, but starting with a decent base helps.
- Branching: Even young nursery stock might have some low branches. These are valuable for developing the lower trunk and creating a sense of age. Don’t discount a tree just because it doesn’t have a lot of branches yet; you can encourage new growth.
- Health: This is obvious, but I can’t stress it enough. Make sure the tree is healthy. Look for good leaf color, no signs of pests or disease, and a firm trunk. A sick tree is just going to be a headache.
When selecting a box elder, think about the long game. You’re not just buying a tree; you’re choosing a future bonsai. Look for the potential for a strong trunk and a good foundation, even if the rest of the styling needs to be done by you. It’s about seeing what the tree could become.
I’ve found that starting with a healthy, vigorous specimen, whether collected or purchased, makes the entire process much more enjoyable. It’s like having a good Siberian elm bonsai to start with; the foundation is solid, and you can focus on the artistry.
Best Potting Soil & Container Setup for Box Elder Maple Bonsai
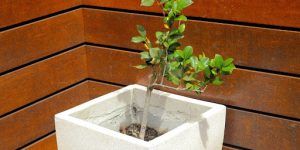
When I first started working with Box Elder maples for bonsai, I spent a lot of time figuring out the right soil and pot setup. It’s not overly complicated, but getting it right makes a big difference in how the tree grows and stays healthy.
Soil Mix
Box Elders aren’t too picky about soil, which is good news. They can handle a variety of mixes, but they thrive in something that drains well. I usually go for a mix that’s about 50% akadama, 25% pumice, and 25% lava rock. This gives good aeration and prevents water from sitting around the roots too long. Some people also use a bit of organic compost, but I keep that to a minimum, maybe 10% at most, to avoid water retention issues. The key is that the soil should be gritty and allow water to flow through freely.
Container Choice
For the pot itself, I’ve found that Box Elders appreciate a bit more root space than some other bonsai species. Peter Adams, a well-known bonsai artist, mentioned that maples need ‘root run,’ which I take to mean a pot that isn’t too shallow. While a very shallow pot can work for a mature tree, starting, or for younger trees, I prefer a pot that offers a bit more depth. This helps the tree establish a strong root system. For the pot’s appearance, I tend to lean towards unglazed, earth-toned pots, but glazed ones in white or blue can also look quite nice. The pot should have good drainage holes, of course.
Potting and Repotting Schedule
Box Elders are pretty fast growers, so I usually repot them every two years. The best time to do this is in the spring, just as the buds are starting to swell but before they fully open. This timing helps the tree recover quickly. When repotting, I’ll trim back about a third of the root mass, focusing on removing any thick, circling roots and encouraging finer feeder roots. It’s important to make sure the soil is slightly moist when you repot, not bone dry or soaking wet.
Getting the soil and pot right is a foundational step for any successful bonsai. It directly impacts root health and the tree’s ability to absorb water and nutrients.
I’ve learned that even if I miss the absolute perfect window for repotting, Box Elders are usually forgiving. I did repot a small Swamp maple bonsai I grew from seed back in 2019, and while it wasn’t the ideal time, the tree bounced back. It had a nice trunk with good movement and taper, and I knew I could finish its development in a bonsai pot. This experience taught me that while ideal timing is best, understanding the tree’s needs and being prepared to help it recover is also important. For those looking to start their bonsai journey, understanding the needs of species like the banyan tree bonsai can provide a good baseline for general bonsai care principles.
Sunlight & Water Needs: Caring for Box Elder Maple Bonsai
Box Elder Maples, or Acer negundo, are pretty forgiving when it comes to sunlight and water, which is great news for us beginners. I’ve found that they do best with a good amount of sun. Aim for at least four to six hours of direct sunlight each day. Too little sun, and you’ll notice the growth gets a bit leggy, and the leaf color might not be as vibrant. However, during the hottest part of the summer, especially if you’re in a really hot climate, a little afternoon shade can prevent the leaves from scorching. It’s a bit of a balancing act.
When it comes to watering, consistency is key. I try to keep the soil evenly moist, but not waterlogged. Think of it like a wrung-out sponge – damp, but not dripping. If the soil dries out completely, especially when the tree is in full sun, it can really stress the plant. I check the soil moisture by sticking my finger about an inch down. If it feels dry, it’s time to water. During the summer, I might be watering every day or even twice a day if it’s particularly hot and windy. In winter, I cut back on watering, but I still make sure the soil doesn’t dry out completely. It’s important to remember that bonsai pots dry out much faster than regular garden pots.
Sunlight Requirements
Box Elder Maples generally prefer full sun. This helps them develop strong growth and good color. While they can tolerate some partial shade, prolonged periods without direct sunlight can lead to weaker stems and smaller leaves. If you’re growing your bonsai indoors, place it in your sunniest window. For outdoor bonsai, a spot that gets morning sun and perhaps some protection from the harsh afternoon sun in very hot climates is ideal.
Watering Schedule
My watering schedule depends on the weather and the season. Here’s a general idea of how I approach it:
- Spring: Water when the top inch of soil feels dry. Growth is starting, so consistent moisture is good.
- Summer: This is the most active growing season. I check the soil daily, and water thoroughly whenever the top layer feels dry. This might be daily or every other day in hot weather.
- Autumn: As temperatures cool, I reduce watering frequency. Still, keep the soil from drying out completely.
- Winter: Water sparingly, only when the soil is dry to the touch. Protect the roots from freezing if you live in a colder climate.
Soil Moisture Check
It’s easy to over- or under-water. I always do a quick finger test before watering. Just poke your finger about an inch into the soil. If you feel moisture, hold off. If it feels dry, it’s time to give your Box Elder a drink. This simple step has saved me a lot of guesswork.
Keeping the soil consistently moist but not soggy is the goal. It’s better to water thoroughly when needed than to give it little sips every day, as this encourages deeper root growth. I learned this the hard way with my first bonsai; the roots stayed too shallow, and it struggled.
Fertilizing Needs
I feed my Box Elder Maples regularly during the growing season, which is typically from spring through early autumn. I use a balanced liquid bonsai fertilizer, diluted to half-strength, every two weeks. Alternatively, I sometimes use slow-release fertilizer pellets applied according to the package directions. This provides a steady supply of nutrients without overwhelming the tree. Remember to stop fertilizing in late autumn and winter when the tree’s growth slows down. For those looking for a good fertilizer, consider trying a balanced bonsai fertilizer.
Seasonal Care: When to Prune, Repot, and Fertilize
Understanding the seasonal rhythm of your Box Elder Maple is key to its health and development. I’ve found that paying attention to these cycles makes a big difference in how the tree looks and grows.
Fertilizing Schedule
I generally start fertilizing in early spring as the buds begin to swell. A balanced liquid fertilizer, diluted to half-strength, works well. I apply it every two weeks throughout the growing season, which typically runs from spring through late summer. It’s important to stop fertilizing about a month or two before the first frost to allow the tree to harden off for winter. I also avoid fertilizing a recently repotted tree for about a month, letting its roots recover first.
Repotting Timing
Repotting is usually best done in early spring, just before the new growth starts. This is when the tree is coming out of dormancy and can recover most quickly. I check the roots every two to three years for younger trees, and perhaps every three to five years for more established ones. If I see roots circling the pot or growing out of the drainage holes, it’s time for a repot. When repotting, I like to prune about a third of the root mass to encourage new root growth.
Pruning and Shaping
Structural pruning, which involves removing larger branches to define the tree’s basic shape, is best done during the dormant season, typically late winter or early spring. This allows me to see the tree’s structure clearly and minimizes stress. Maintenance pruning, like pinching back new growth to encourage finer branching and ramification, can be done throughout the growing season. I usually pinch back new shoots after they have extended a bit, often to the first or second set of leaves.
It’s a good practice to coordinate root pruning with branch pruning. This helps ensure the root system isn’t overwhelmed trying to support a canopy that’s too large for it. Balancing these two aspects is important for the tree’s overall vigor.
Here’s a general guideline for my seasonal care plan:
- Spring: Begin fertilizing, repot if needed (pruning roots at this time), and perform structural pruning. Start maintenance pinching as new growth appears.
- Summer: Continue regular fertilizing and maintenance pinching. Watch for pests and diseases. Wiring can be done, but be mindful of the bark.
- Autumn: Gradually reduce watering. Stop fertilizing about a month before the first expected frost. Clean up fallen leaves.
- Winter: Protect the tree from harsh freezes if it’s outdoors. Minimal watering is needed, just enough to keep the soil from drying out completely. This is a good time to plan for the next growing season.
Pruning Techniques: Structural Cuts vs Maintenance Pruning
When I first started working with my box elder maple, I quickly learned that pruning is a big deal. It’s not just about making the tree look neat; it’s about shaping its future. I’ve found there are two main types of pruning I do: structural cuts and maintenance pruning. They serve different purposes, and knowing when to use each is key.
Structural Pruning
Structural pruning is for the big stuff. Think of it as setting the main bones of the tree. I do this when I need to remove larger branches that are growing in the wrong direction, crossing other branches, or just don’t fit the overall design I have in mind. These are the cuts that define the tree’s shape and character. It’s important to make these cuts cleanly and at the right time of year, usually during the dormant season, to help the tree heal properly. I try to visualize the final shape before I make any big cuts, because once a branch is gone, it’s gone.
Maintenance Pruning
Maintenance pruning is more about refinement. This is what I do throughout the growing season. It includes things like pinching back new growth to encourage denser foliage and shorter internodes, or removing small, unwanted shoots that pop up. It’s a continuous process that keeps the tree tidy and helps develop finer branching. I also use this type of pruning to manage the tree’s size and shape as it grows. For instance, if a branch is getting too long, I’ll trim it back to a bud or a smaller side branch. This encourages the plant to put its energy into developing more compact growth. It’s a bit like tidying up after the main construction is done.
Leaf Pruning (Defoliation)
Sometimes, I’ll do something called leaf pruning, or defoliation. This involves removing all the leaves from the tree during the growing season, usually in early summer. It sounds drastic, but it makes the tree grow a second set of leaves, and these new leaves are typically smaller than the first. This is a great way to get those finer textures and smaller leaf size that we want in bonsai. I usually only do this every other year, and not in the same year I repot the tree, as that’s too much stress all at once. It’s a technique that helps with ramification, which is getting lots of fine twigs. If you’re looking to improve the branching on your Meyer lemon trees, a similar approach of encouraging denser growth can be beneficial.
Timing and Approach
- Structural Pruning: Best done during dormancy (late winter to early spring) before new growth starts. This minimizes stress and allows for better wound healing.
- Maintenance Pruning: Done throughout the growing season as needed to control growth and refine shape.
- Leaf Pruning: Typically done in early summer, every other year, to encourage smaller leaves and finer twigging.
Making thoughtful pruning decisions is a continuous learning process. I’ve learned to observe my tree closely and understand its growth patterns before I reach for the shears. It’s about working with the tree, not against it, to achieve the desired aesthetic.
Wiring & Shaping: Creating Bonsai Structure with Box Elder Maple
Wiring and shaping are where the real artistry of bonsai comes into play, and the Box Elder Maple is a fantastic subject for this. I find that working with this tree requires a bit of patience, but the results are well worth the effort. When I approach wiring, my main goal is to guide the branches into the desired position, creating the overall structure of the tree. It’s important to remember that the bark on Box Elders can be a little delicate, so I always take precautions to protect it. Using raffia or paper tape when wiring is a good idea, especially on younger branches. I usually start wiring in the spring or early summer when the branches have a bit of flexibility but aren’t too soft. The wire should be snug enough to hold the branch, but not so tight that it digs in. I check it regularly and remove it before it starts to bite into the bark, which is usually after about six months, though sometimes sooner if I see any signs of it causing damage. For shaping the trunk itself, especially on younger trees, I’ve had success using stakes. This helps me establish a straight trunk for a formal upright style or introduce a gentle curve if that’s what I’m aiming for. It’s all about coaxing the tree into the shape I envision.
When to Wire
- Spring to early summer: This is generally the best time to wire Box Elder branches. The branches have enough growth to hold the wire, but they are still pliable.
- After pruning, Wiring is often done after structural pruning, allowing you to shape the newly exposed branches.
- Avoid extreme heat or cold: Wiring during periods of intense heat or freezing temperatures can stress the tree and make the branches more brittle.
Wiring Techniques
- Anodized aluminum wire: I prefer using anodized aluminum wire because it’s softer and easier to bend than copper wire, making it less likely to damage the bark. It also holds its shape well.
- Proper gauge: Select a wire gauge that is about one-third to one-half the thickness of the branch you are wiring. Using wire that is too thick can be difficult to manage and may damage the branch.
- Wrapping technique: Wrap the wire around the branch at a 45-degree angle, ensuring it is snug but not constricting. Overlap the wire slightly with each turn. When wiring two branches close together, I often use a technique where the wire wraps around both, creating a unified structure.
Shaping Considerations
The key to successful shaping is to work with the tree’s natural growth habits. I try to anticipate how the branches will respond to wiring and pruning, making adjustments as needed. It’s a continuous process of guiding and refining the tree’s form.
- Branch placement: Aim to position branches to create good spacing and avoid crossing or rubbing against each other. This also helps with light penetration and air circulation within the canopy.
- Trunk movement: For a more dynamic look, I might introduce gentle curves into the trunk. This can be achieved through careful wiring or by using guy wires attached to the pot or other branches.
- Future growth: Always consider how the branch will grow after wiring. You want to set it up for success, not create future problems.
Branch Management: Encouraging Ramification and Balance
Encouraging Fine Branching
To get that dense, full look on your Box Elder bonsai, you need to encourage fine branching, also known as ramification. This is where the magic happens, turning a simple branch into a delicate, twiggy structure that mimics a mature tree. It’s all about managing new growth. When a new shoot extends, let it grow out a couple of nodes, then pinch or cut it back to just one or two nodes. This process tells the tree to send out new shoots from those remaining nodes. The more you do this, the closer together your leaves and new branches will form, creating that desirable, compact appearance.
Strategic Pruning for Branch Development
When I’m working on branch structure, I think about where I want the tree to fill out. Pruning isn’t just about removing unwanted growth; it’s about directing it. If a branch is growing too strongly in one direction, I might prune it back to encourage growth from a bud on the inside or underside of the branch. This helps to create a more balanced canopy. Remember, a branch removed is gone for good, so I always pause and consider the long-term impact of any major cut. It’s a bit like planning a garden – you want to think about how everything will look and grow over time.
Balancing the Canopy
Achieving balance in a bonsai means ensuring that no single area of the tree looks too heavy or too sparse. I look at the overall shape and try to distribute the foliage evenly. If one side is developing much faster than another, I might prune the more vigorous side more heavily or even wire a less developed branch to encourage it to grow into a better position. It’s a constant process of observation and adjustment.
Sometimes, you have to let a branch grow out a bit longer than you’d ideally like to give it the strength to support new growth further down the line. It’s a give and take.
Managing Growth for Ramification
- Pinching: Regularly pinch back new shoots to one or two nodes. This is the primary way to get more branches.
- Pruning: Make clean cuts when removing larger branches or shoots that are not contributing to the desired design.
- Leaf Pruning (Defoliation): For some species, removing some or all of the leaves during the growing season can encourage a second flush of growth with smaller leaves and more compact internodes. I’m careful with this technique, though, and only do it on healthy, vigorous trees. Decandling bonsai trees is a similar concept for pines, but for maples, it’s more about leaf reduction.
Developing a Natural Look
When I’m encouraging ramification, I’m not just trying to make the tree look dense; I’m aiming for a natural, aged appearance. This means allowing some branches to extend and thicken appropriately, rather than pinching everything back to a tiny stub. It’s about creating a hierarchy of branches, from the main structural limbs down to the finest twigs. This layered approach gives the bonsai depth and realism. I also consider how the branches will look in winter, when the leaves are gone. Good branch structure is visible year-round.
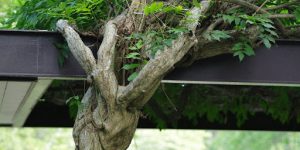
Developing Nebari & Trunk Taper in Box Elder Bonsai
Developing the nebari, or surface roots, and achieving a good trunk taper are key to making a Box Elder Maple look like a mature tree in miniature. It’s not something that happens overnight, but with a bit of planning and patience, I can make a difference.
Encouraging Nebari
To get those nice, radiating surface roots, I often start by planting the young tree in a shallow container or even directly in the ground for a few years. When I repot, I try to spread out the roots that are growing downwards and encourage new ones to grow outwards. Sometimes, I’ll even make small cuts on the main roots to encourage branching closer to the trunk. It’s a bit like coaxing them to spread out like a fan.
Creating Trunk Taper
Trunk taper is the gradual narrowing from the base of the trunk to the top. A thick, straight trunk doesn’t look very natural for a bonsai. I achieve taper in a few ways. One method is to let the tree grow a bit more freely for a season or two, allowing the base to thicken more than the upper parts. Then, I’ll prune it back to a lower branch. Another technique involves wiring the trunk when it’s young and flexible, gently bending it to create a more tapered shape.
- Root over rock: Planting the tree with its roots spread over a rock can naturally create a beautiful nebari.
- Air layering: This technique can be used on thicker branches to create new trunks or to thicken the base of an existing trunk, promoting taper.
- Trunk chopping: A more drastic measure, but cutting a trunk back hard can encourage new growth from lower down, leading to a more tapered appearance.
I find that focusing on these two elements, nebari and trunk taper, early in the tree’s development sets the stage for a convincing bonsai. It’s about creating that illusion of age and a strong foundation.
I’m always looking for ways to improve the base of my Box Elder Maples, and developing good nebari and trunk taper is a big part of that. It takes time, but the results are well worth the effort.
Winter Protection Tips for Outdoor Maple Bonsai
When the cold weather rolls in, my outdoor maple bonsai needs a bit of extra attention to get through the winter. It’s not just about keeping them from freezing solid, but also protecting them from harsh winds and drastic temperature swings. I’ve learned that different maples have slightly different needs, but generally, protecting the roots is the main goal.
Root Protection
My box elder maples, like many maples, have roots that are more sensitive to frost than the branches. Even if the tree itself is hardy in my zone, the roots in the pot can freeze much faster. I usually move my potted bonsai into a sheltered spot before the real cold hits. This might be against the side of my house, in an unheated garage, or even tucked into a cold frame. The key is to shield them from the worst of the elements.
Mulching and Insulation
For trees that I leave in their pots outdoors, I make sure to insulate them well. I’ll often group them to share some warmth and then pack insulating material around the pots. Things like straw, bark chips, or even bubble wrap can work. I’ve found that a thick layer of mulch on top of the soil in the pot also helps keep the root ball from freezing too quickly. It’s a bit like tucking them into a cozy blanket.
Watering During Winter
It’s easy to forget about watering when it’s cold, but it’s still important. The soil shouldn’t dry out completely, even in winter. I check the soil moisture periodically, especially on warmer days when the ground isn’t frozen. If it feels dry, I’ll water them, but only when the temperature is above freezing. Overwatering when it’s cold can lead to root rot or ice damage.
Monitoring for Pests
Even in winter, pests can sometimes find a way to bother my trees. I try to give them a good look-over before bringing them into their winter spot, and then again periodically. If I spot any issues, I deal with them right away. It’s much easier to manage a small problem before it becomes a big one. Keeping the trees healthy during the growing season helps them withstand winter stress, and proper care is essential for their long-term health, much like the work done at places like the National Bonsai & Penjing Museum.
Gradual Acclimation
When I bring my maples inside for the winter, I don’t just shove them into a warm house. I try to acclimate them gradually. Similarly, when spring arrives, I don’t put them straight out into full sun. I move them to a more protected spot first and gradually expose them to more light and warmer temperatures. This helps prevent shock.
Common Pests & Diseases: Prevention and Treatment
Keeping an eye out for pests and diseases is a big part of making sure your box elder maple bonsai stays healthy and looks good. I’ve found that a few common issues pop up more often than others.
Common Pests
- Aphids: These little guys love to hang out on new growth and suck the sap right out. They can make your leaves look all crinkled and leave a sticky residue called honeydew. While they won’t kill your tree, they sure can make it look messy.
- Fall Webworms: You’ll spot these by the messy webs they build on branch tips. They eat the leaves inside the web. For small infestations, I just prune off the affected branches. If it’s a bigger problem, I might use a spray like Bacillus thuringiensis (Bt), which is a biological control.
- Scales: These can be tricky to spot at first because they look like little bumps on the trunk and branches. They also feed on sap. Horticultural oil is usually my go-to for dealing with scales. It smothers them pretty effectively.
- Mites: These are super tiny, so you might not see them until your tree’s leaves start looking discolored, maybe yellow or bronzed. By the time you notice the damage, the infestation can be pretty bad. Horticultural oil can help a bit, but sometimes stronger treatments are needed.
Common Diseases
Generally, box elder maples are pretty tough, especially if they’re in well-drained soil and not stressed. However, a couple of things can show up:
- Leaf Spots: Various fungi can cause spots on the leaves. Most of the time, these aren’t serious enough to warrant spraying chemicals. I usually just clean up fallen leaves to reduce the source of infection for the next year.
- Powdery Mildew: This shows up as a white, powdery coating on the leaves. Good air circulation helps prevent this. If it becomes a problem, there are specific fungicides that can be used.
Prevention and Treatment Strategies
My approach is mostly about prevention. Making sure the tree has good air circulation, proper watering, and isn’t stressed by poor soil conditions goes a long way. For pests, I try to catch them early. A quick spray of insecticidal soap or horticultural oil can often handle minor outbreaks before they get out of hand. If I see any signs of disease, I focus on improving the tree’s overall health and removing affected parts. For any significant pest or disease issues, I’d look into [specific bonsai pest control](<a href=”#98b3″>specific bonsai pest control</a>) options. It’s always better to act fast when you notice something isn’t quite right with your tree.
Year‑By‑Year Development Plan: From Nursery Stock to Bonsai Masterpiece
Developing a Box Elder Maple into a bonsai masterpiece is a journey, not a race. It requires patience and a year-by-year approach to guide its growth and shape. I’ve found that breaking it down into manageable stages makes the process much less daunting.
Year 1: Establishing the Foundation
My first year usually focuses on getting the young tree healthy and starting to think about the trunk. If I’m starting from nursery stock, I’ll often repot it into a training pot with better bonsai soil. This is also when I’ll make any initial structural cuts to remove unwanted branches or establish the main trunk line. It’s all about setting a good base for future development. I’m not worried about fine details yet; it’s more about survival and basic structure.
Year 2-3: Trunk Development and Primary Branches
During these years, I concentrate on thickening the trunk and selecting the first set of primary branches. This might involve letting the tree grow a bit more freely, perhaps in a larger training pot or even in the ground for a season if I want rapid thickening. I’ll use wiring to guide the trunk’s movement and position the main branches. Repotting every year or two is important to manage the root system. The goal here is to create a solid, tapered trunk with well-placed foundational branches.
Year 4-6: Branch Refinement and Ramification
Now the real shaping begins. I focus on developing secondary and tertiary branches, encouraging ramification (the fine twigging that gives a bonsai its dense foliage). This involves careful pruning to direct growth and wiring to position new branches. I’ll start thinking more about the overall silhouette and balance of the tree. Repotting continues, usually every 2-3 years, to maintain vigor and refine the root structure. This is where the tree starts to look like a miniature version of a mature tree.
Year 7+: Styling and Maintenance
By this stage, the basic structure is in place. My work shifts to refining the styling, maintaining the tree’s shape through regular pruning, and continuing to develop ramification. I’ll pay close attention to details like branch placement, foliage pads, and the overall aesthetic. Repotting is still necessary, but perhaps less frequently, maybe every 3-5 years, depending on the tree’s growth. It’s a continuous process of observation and subtle adjustments to keep the bonsai looking its best. Growing a bonsai is a rewarding endeavor, involving careful cultivation and shaping.Growing a bonsai takes time and dedication.
Patience is key throughout this entire process. Rushing any stage can set back years of work. It’s better to let the tree tell you when it’s ready for the next step.
Want to see how a tiny sapling grows into a stunning bonsai tree? Our yearly plan shows you every step, from the very beginning to becoming a master. It’s like a roadmap for your tree’s journey! Ready to start your bonsai adventure? Visit our website to learn more and get your free quote today!
Frequently Asked Questions
What are the basic care needs for a Box Elder maple bonsai?
I find that Box Elder maples are quite forgiving. They don’t need a lot of fuss. I usually give them a good amount of sunlight, but I’m careful not to let them dry out completely. Watering depends on the weather, but I check the soil regularly. If the top inch feels dry, it’s time to water.
How do I choose a good Box Elder maple for bonsai?
When I’m starting with a young tree or seedling, I look for one with a healthy root system and a decent trunk. Nursery stock is often a good starting point because it’s already established. I pay attention to the overall health and vigor of the plant.
What kind of soil and pot should I use for my Box Elder bonsai?
For soil, I prefer a mix that drains well but also holds some moisture. A common bonsai soil mix works well. I usually use a combination of akadama, pumice, and lava rock. The pot size should be appropriate for the tree’s root system, allowing for good drainage.
When is the best time to prune a Box Elder maple bonsai?
I typically do major pruning in late winter or early spring before new growth starts. This helps me shape the tree and remove any unwanted branches. For maintenance, I’ll pinch back new growth during the growing season to keep the shape tidy.
How often should I repot my Box Elder maple bonsai?
I usually repot my Box Elder maples every two to three years. The best time for this is in early spring, just as the buds are starting to swell. This is also a good time to trim the roots to encourage healthy new growth.
How do I shape a Box Elder maple bonsai using wire?
I use wiring to guide the branches into the desired shape. I usually do this in the summer when the tree has full leaves. It’s important to protect the bark with raffia and not leave the wire on for too long, typically no more than six months, to avoid damaging the tree.
What techniques can I use to encourage ramification (more branches) on my Box Elder?
To encourage more branches and a fuller look, I focus on pinching back new growth. This tells the tree to produce more shoots. I also strategically prune branches to promote back-budding, which creates finer twigging.
How can I develop the trunk taper and nebari (surface roots) on my Box Elder bonsai?
Developing the base, or nebari, involves encouraging surface roots to spread out. I sometimes expose the top layer of roots during repotting to help this along. For trunk taper, I might use wiring on young trees or allow controlled growth to create a thicker base that tapers upwards.