Box Elder Tree Seeds: Harvesting and Planting Guide

- June 24, 2025
- By Wayne Ridge
Want to grow your own box elder trees? It’s a pretty straightforward process, especially if you know how to handle their seeds. This guide will walk you through everything, from finding and collecting box elder seeds to getting them ready for planting and making sure your new seedlings grow strong. We’ll cover all the basics so you can successfully cultivate these adaptable trees.
Key Takeaways
- Box elder seeds are best collected when they are fully mature, typically in late summer or early fall.
- Properly drying and storing box elder seeds in a cool, dry place helps them stay viable for future planting.
- Box elder seeds usually need a period of cold stratification to break dormancy and sprout successfully.
- Planting box elder seeds in well-draining soil at the right depth and time is important for good germination.
- Young box elder trees need consistent watering, mulching, and protection to grow into healthy, established trees.
Box Elder Tree Seeds: An Overview
Box elder trees, scientifically known as Acer negundo, are a common sight across North America. They’re known for their adaptability, but also sometimes for being a bit
Why Box Elder (Acer negundo) Seeds Matter for Cultivation
Box elder seeds are packed with perks for anyone aiming to grow hardy, fast trees on a budget. By gathering and planting these winged samaras, you tap into a natural way to fill your yard or field with green cover. They shine in spots where other trees often give up.
- Cost-effective: Free seed supply if you pick wild stands.
- Local Adaptation: Seeds from nearby trees usually handle your soil and weather better.
- Wildlife Magnets: Birds and small mammals feed on or shelter near young sprouts.
- Erosion Control: Dense roots hold soil firmly in place.
- Urban Hardy: It can stand pollution, compacted ground, and shifting moisture.
| Seed Condition | Germination Rate |
| Fresh (harvest fall) | 85% |
| Stored 1 year | 60% |
| Stored 2 years | 45% |
Planting box elder seeds in the fall means you score a batch of sprouting trees by spring with almost no fuss.
I still remember the season I scooped up handfuls of samaras under my old maple. A few weeks later, dozens of seedlings poked through the soil. Early settlers counted on this tree’s rapid growth and drought resistance to shade prairie homes and stop the wind. If you need a reliable, low-cost way to raise shade trees, starting from seed is the move—just watch your germination rates and store any extras in a cool, dry spot.
When and Where to Harvest Box Elder Seeds
Knowing when and where to gather your box elder seeds is key to a successful planting season. Timing is everything, and location plays a big role in the quality of the seeds you’ll collect. Let’s get into the details so you can get the best start.
Generally, you’ll want to harvest box elder seeds in the fall, typically from September to October. This is when the samaras (the winged seeds) have matured and are ready to detach from the tree. Keep an eye on the trees in your area, and you’ll start to notice when the seeds are turning brown and beginning to fall.
When it comes to location, look for healthy, mature box elder trees. Avoid trees that show signs of disease or stress, as their seeds may not be as viable. Areas with good sunlight and well-drained soil tend to produce healthier seeds. Also, consider the accessibility of the trees. You’ll want to be able to reach the seeds without causing damage to the tree or yourself.
Here are a few things to keep in mind:
- Timing: Harvest when samaras are brown and starting to fall.
- Location: Choose healthy, mature trees in sunny areas.
- Accessibility: Ensure you can safely reach the seeds.
Harvesting box elder seeds isn’t just about grabbing any seed you see. It’s about understanding the tree’s life cycle and choosing the right moment and place to collect the best possible seeds for planting. This attention to detail can make a big difference in the success of your planting efforts.
Consider the following table for a quick reference:
| Factor | Consideration |
| Time of Year | Fall (September – October) |
| Tree Health | Healthy, mature trees |
| Sunlight | Areas with good sunlight |
| Soil Drainage | Well-drained soil |
| Seed Color | Brown |
| Seed Detachment | Seeds are starting to fall from the tree |
| Accessibility | Safe and easy access to the seeds |
| Boxelder bugs | It can affect seed quality; inspect trees carefully |
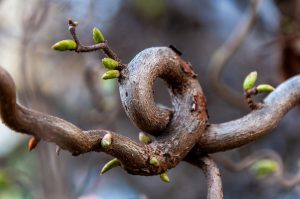
Identifying Mature Samaras: Signs They’re Ready
Okay, so you’re trying to figure out when those box elder seeds are actually ready to harvest, right? It’s not always super obvious, but there are a few key things to look for. Basically, you want to make sure you’re not grabbing them too early or too late. Timing is everything when it comes to seed collecting.
The color and texture of the samaras (those winged seeds) are your biggest clues.
Here’s what I usually keep an eye out for:
- Color Change: Immature samaras are usually green. As they ripen, they’ll start to turn tan or brown. You want them to be mostly brown, but not so dark that they look like they’re starting to rot.
- Dryness: They should feel dry to the touch. If they’re still a little bit squishy or damp, they’re probably not quite ready.
- Easy Detachment: When they’re mature, they should come off the tree fairly easily. Give them a gentle tug. If you have to yank on them, they’re probably not ready yet.
- Wing Rigidity: The wing part of the samara should be firm and not floppy. A floppy wing means the seed inside might not be fully developed.
I’ve found that checking a few different branches on the tree is a good idea. Sometimes, the samaras on one part of the tree will ripen faster than others. Also, the weather can play a big role. A lot of rain might delay ripening, while a dry spell could speed things up.
Don’t just grab the first ones you see. Take a little time to inspect them. It’s worth it to get a good batch of viable seeds. If you want to grow California Boxelder, you need to know when to harvest.
Seed Viability: Moisture Content for Optimal Harvest
Okay, so you’re ready to harvest your box elder seeds. But how do you know if they’re good? Seed viability is key, and a big part of that is moisture content. Too much or too little moisture, and your seeds won’t germinate well, if at all. It’s a bit of a Goldilocks situation.
Getting the moisture content right is crucial for successful storage and germination.
Here’s the deal:
- Ideal Range: Aim for a moisture content between 8% and 12%. This range generally keeps the seeds viable without encouraging mold or premature germination.
- Testing: You can use a moisture meter, but honestly, a simple “snap test” works too. If the seed snaps cleanly, it’s likely dry enough. If it bends, it’s still too moist.
- Drying: If your seeds are too moist, spread them out in a single layer in a cool, dry place with good air circulation. Avoid direct sunlight, which can damage them.
It’s important to remember that seed viability decreases over time, even with proper storage. So, while you’re aiming for that perfect moisture content, also keep in mind that fresher is always better. Plan to use your seeds within a year or two for the best results. Think of it like coffee beans – they’re best when freshly roasted, right? Same idea here.
Think of it this way:
| Moisture Level | Potential Issues |
| High | Mold growth, premature germination, rotting |
| Low | Desiccation, damage to the embryo, reduced vigor |
| Optimal | Long-term viability, successful germination |
So, take the time to check and adjust the moisture content of your box elder seeds. It’ll make a big difference in your success rate!
Collecting Techniques: Handpick vs. Mechanical Harvesting
When it comes to gathering box elder seeds, you’ve basically got two main ways to go about it: doing it by hand or using some kind of machine. Each has its own set of pros and cons, so let’s break it down.
Handpicking is pretty straightforward. You pick the mature samaras off the tree. Mechanical harvesting involves using equipment to shake or cut the seeds from the branches. The method you choose often depends on the size of the tree, the number of trees you’re dealing with, and how much time and labor you’re willing to put in.
- Handpicking is great for smaller operations or when you only need a small batch of seeds.
- Mechanical harvesting is more efficient for larger-scale seed collection.
- Consider the impact on the tree when choosing your method.
I remember one time trying to handpick seeds from a huge box elder tree in my backyard. It took me hours, and my arms were so tired! I realized then that if I ever needed to collect a lot of seeds, I’d look into mechanical options.
Cleaning and Drying Box Elder Seeds Post-Harvest
Okay, so you’ve gathered your box elder seeds. Now what? It’s not quite as simple as tossing them in a bag and forgetting about them. Proper cleaning and drying are super important to prevent mold and ensure the seeds stay viable for planting later on. Let’s get into it.
First things first, you’ll want to remove any debris. This means leaves, twigs, bits of the samara wing that broke off – anything that isn’t the seed itself. A simple screen or even just picking through them by hand works fine for small batches. For larger quantities, you might consider using a seed cleaner if you have access to one.
Once they’re relatively clean, it’s time to dry them. The goal is to reduce the moisture content to a level that prevents mold growth during storage.
- Spread the seeds in a thin layer on a screen or tray.
- Place them in a well-ventilated area, away from direct sunlight.
- Turn the seeds occasionally to ensure even drying.
Drying usually takes a week or two, depending on the humidity. You’ll know they’re dry enough when they feel crisp and don’t clump together. Don’t rush this process; patience is key to preserving seed viability. If you’re in a humid environment, a dehumidifier can really speed things up and prevent issues.
After drying, give them one last check to remove any remaining debris. Now they’re ready for storage! Make sure you check out soil preparation before planting.
Storage Tips: How to Keep Seeds Viable Long Term
So, you’ve harvested your box elder seeds, and now you’re wondering how to keep them alive until planting time? It’s pretty simple, but there are a few things you need to keep in mind to make sure those little samaras stay viable. Think of it like putting your seeds into a little hibernation chamber!
First off, let’s talk about the basics. You want to mimic the natural conditions the seeds would experience over winter. This means keeping them cool, dry, and dark. Here’s a breakdown:
- Cool Temperatures: Aim for temperatures between 32°F and 41°F (0°C and 5°C). A refrigerator works great, but make sure they aren’t exposed to freezing temperatures for extended periods.
- Low Humidity: Excess moisture is the enemy. It can lead to mold and premature germination. Keep the seeds in an airtight container with a desiccant.
- Darkness: Light can also trigger germination, which you definitely don’t want while they’re in storage. Opaque containers are your friend.
Proper storage is key to ensuring a good germination rate when you’re ready to plant. Think of it as giving your seeds a head start by preserving their energy and potential.
Now, let’s get into some specifics. After you’ve cleaned and dried your tree seeds (as discussed in the previous section), here’s what I recommend:
- Place the seeds in a paper bag or envelope. This helps absorb any residual moisture.
- Put the paper bag inside an airtight container, like a plastic container or a glass jar. Add a desiccant packet (silica gel) to absorb any remaining moisture.
- Label the container with the date of collection and the species (Acer negundo). This will help you keep track of how old the seeds are.
- Store the container in the refrigerator. Avoid storing them near fruits or vegetables that release ethylene gas, as this can negatively affect seed viability.
How long can you expect your box elder seeds to last? Well, it varies, but with proper storage, you can generally expect them to remain viable for at least a year, and sometimes even longer. Remember that seed viability naturally declines over time, so it’s always best to plant them as soon as possible. If you’re unsure about the viability of your stored seeds, you can always perform a germination test before planting to see how many are still alive and kicking. This involves placing a small sample of seeds on a moist paper towel, sealing them in a plastic bag, and waiting to see if they sprout. It’s a simple way to avoid disappointment later on.
Preparing Seeds for Planting: Scarification & Stratification
Okay, so you’ve got your box elder seeds. Now what? Before you just toss them in the ground, there are a couple of things you should do to increase your chances of success. These steps mimic what happens in nature and can boost germination rates. We’re talking about scarification and stratification. Let’s get into it.
Scarification: Giving Seeds a Helping Hand
Box elder seeds have a tough outer coat. In nature, this coat gets worn down over time by weather and soil. Scarification is basically speeding up that process. It involves weakening the seed coat to allow moisture to penetrate and trigger germination. Think of it as giving the little seed a head start.
Here are a few ways to scarify box elder seeds:
- Rubbing with Sandpaper: Gently rub the seeds between two sheets of fine-grit sandpaper. Don’t go crazy – you just want to thin the coat, not grind the seed to dust.
- Nicking the Seed Coat: Use a knife or nail clipper to carefully make a small nick in the seed coat, away from the embryo.
- Hot Water Soak: Pour hot (not boiling) water over the seeds and let them soak for 12-24 hours. This can help soften the seed coat.
Stratification: Simulating Winter
Many seeds, including box elder, need a period of cold, moist conditions to break dormancy. This is called stratification, and it mimics winter. Without it, the seeds might not germinate even if conditions are otherwise perfect.Ideal temperatures are key for this process.
Here’s how to stratify box elder seeds:
- Moisten a medium: Use peat moss, vermiculite, or even a paper towel. It should be damp, not soaking wet.
- Mix seeds with the medium: Place the seeds in a plastic bag or container filled with the moist medium.
- Refrigerate: Store the bag in your refrigerator (not the freezer!) for 60-90 days. The temperature should be around 35-40°F (2-4°C).
During stratification, check the seeds periodically to make sure the medium is still moist. If it starts to dry out, add a little water. Also, watch for any signs of mold or fungus. If you see any, discard those seeds.
After stratification, your seeds are ready to plant! This process, combined with properplanting site selection, will significantly improve your chances of growing healthy box elder trees.
Sowing Box Elder Seeds: Soil, Depth, and Timing
Getting the sowing process right is super important for box elder seeds. It’s not just about tossing them on the ground and hoping for the best. You need to think about the soil, how deep to plant, and when to do it. Let’s break it down.
Soil Preparation
Box elder trees aren’t too picky, but they do prefer well-draining soil. They can handle sandy, loamy, and even clay soils, which is pretty cool. Before you plant, clear the area of any weeds or rocks. Weeds will steal nutrients and water from your little seedlings, so a clean start is key. Loosen the soil to about 12-18 inches deep. This helps with aeration and lets the roots grow more easily. Mix in some compost or well-rotted manure to add nutrients and help the soil hold moisture. If your soil doesn’t drain well, add some sand or perlite. Box elders don’t like sitting in waterlogged soil.
Planting Depth
Planting depth is crucial for successful germination. You don’t want to plant them too deep, or they might not be able to reach the surface. Too shallow, and they could dry out. A good rule of thumb is to plant them about 1/4 inch deep. Just scatter the seeds lightly over the soil and cover them gently. This protects them from wind and animals. After planting, water the seeds gently with a fine mist. Keep the soil moist, but not soaked, until they germinate.
Timing is Everything
Timing is also a big deal. Ideally, you should plant box elder seeds in the fall. This lets them go through a natural cold stratification process over the winter. That cold period is what breaks their dormancy and gets them ready to sprout in the spring. If you live somewhere with mild winters, you can mimic this by putting the seeds in the fridge for 90-120 days before planting. This is a must if you want good germination rates. Speaking of good germination rates, make sure you are using fresh seeds for the best results.
Think of it like this: the seeds need a little winter nap before they wake up ready to grow. If you skip the cold stratification, they might not sprout at all, or they might sprout unevenly. So, plan ahead and give them the chill time they need.
Additional Tips
- Cover the planting area with mulch to insulate the seeds and protect them from extreme temperatures.
- Use wire mesh to keep animals from digging them up.
- Make sure the planting site gets at least 4-6 hours of direct sunlight each day.
- The soil should be slightly acidic to neutral (pH 6.0-7.5).
Seedling Care: Watering, Mulching, and Protection
Okay, so you’ve got your little box elder seedlings popping up – awesome! Now comes the part where you keep them alive and thriving. It’s not rocket science, but it does take a little attention. Think of it like raising tiny, leafy babies. They need food, water, and protection from the elements (and hungry critters).
Watering Your Seedlings
Watering is probably the most important thing in the beginning. You don’t want to drown them, but you definitely don’t want them drying out either. The goal is consistently moist soil, not soggy or bone-dry.
- Frequency: How often you water depends on the weather and your soil. Check the soil moisture every day or two. If the top inch feels dry, it’s time to water. During hot, sunny spells, you might need to water daily. When it’s cooler or rainy, you can back off a bit.
- Method: Water gently! Use a watering can with a rose head or a hose with a gentle spray nozzle. You don’t want to blast the little guys with a firehose. Water at the base of the plant to avoid wetting the leaves, which can lead to fungal problems.
- Time of Day: Early morning is usually the best time to water. This gives the leaves time to dry out before nightfall, reducing the risk of disease. Plus, less water is lost to evaporation compared to watering in the heat of the day.
Mulching for Moisture and More
Mulch is your friend. It helps retain moisture in the soil, suppresses weeds, and regulates soil temperature. Plus, it looks nice!
- What to Use: Organic mulches like wood chips, shredded bark, or straw are great choices. They decompose over time, adding nutrients to the soil. Avoid using rocks or gravel, as they can heat up the soil too much.
- How Much: Apply a 2-3 inch layer of mulch around the base of the seedlings, leaving a little space around the stem to prevent rot. Don’t pile the mulch up against the stem.
- When to Apply: Apply mulch as soon as you plant the seedlings. Replenish it as needed throughout the growing season.
Protecting Your Precious Seedlings
Little seedlings are vulnerable. They’re like a tasty snack for all sorts of creatures, and they can easily be damaged by wind, sun, or frost. Here’s how to protect them:
- Pest Control: Keep an eye out for pests like slugs, snails, and insects. Handpick them off the plants, use organic pest control methods, or consider using netting to protect the seedlings. To protect your California Boxelder, consider implementing some deterrent methods.
- Sun Protection: If you’re planting in a very sunny location, provide some shade for the seedlings, especially during the hottest part of the day. You can use shade cloth, row covers, or even just prop up some branches to create a little shade.
- Wind Protection: If you live in a windy area, protect the seedlings from strong winds. You can use windbreaks like fences, shrubs, or even just stakes and burlap. Wind can dry out the soil and damage the delicate seedlings.
Remember, seedling care is all about observation. Check your seedlings regularly, and adjust your watering, mulching, and protection as needed. With a little TLC, you’ll have healthy, thriving box elder trees in no time.
Transplanting Young Trees: Best Practices and Timing
So, you’ve nurtured your box elder seedlings, and they’re ready to move to their permanent home. Exciting! But transplanting can be stressful for young trees, so it’s important to do it right. Timing and technique are key to a successful transplant. Let’s walk through the best practices to ensure your young box elders thrive.
Optimal Transplant Timing
Timing is everything. Transplanting during the dormant season gives the tree a chance to establish roots before the demands of new growth kick in. Here’s a breakdown:
- Early Spring: Before the buds break is ideal. The ground is workable, and the tree hasn’t started putting energy into leaf production.
- Late Fall: After the leaves have fallen but before the ground freezes is another good option. This allows the roots to settle in over the winter.
- Avoid: Summer transplanting is generally not recommended due to heat stress and high water demand. If you must transplant in summer, take extra precautions to minimize root disturbance and provide plenty of water.
Preparing the New Site
Just like preparing the soil for seeds, you need to prep the new location. This is a crucial step that shouldn’t be skipped. Make sure the new spot has well-draining soil and gets the right amount of sunlight for box elder maple timber to thrive. Dig a hole that’s twice as wide as the root ball and just as deep. This gives the roots room to spread out. Mix some compost into the soil you removed from the hole to give the tree a nutrient boost.
The Transplanting Process
Carefully remove the seedling from its container. If it’s root-bound (roots circling tightly around the pot), gently loosen the roots with your fingers or a small tool. Place the tree in the hole, making sure the top of the root ball is level with the ground. Backfill the hole with the amended soil, gently tamping it down to remove air pockets. Water the newly transplanted tree thoroughly. Add a layer of mulch around the base of the tree to help retain moisture and suppress weeds.
Transplanting is a bit like moving house for a tree. It needs time to adjust to its new surroundings. Be patient, provide consistent care, and your box elder will settle in nicely.
Post-Transplant Care
After transplanting, consistent care is essential. Water deeply and regularly, especially during dry periods. Avoid fertilizing immediately after transplanting; wait until the tree shows signs of new growth. Protect the young tree from pests and diseases. Monitor for signs of stress, such as wilting or yellowing leaves, and address any issues promptly. Consider using a tree service if you notice any major issues.
Here’s a simple watering schedule to follow:
| Week After Transplant | Watering Frequency | Amount of Water | Notes |
| 1-2 | Every other day | Deep watering | Ensure the soil is moist but not soggy |
| 3-4 | Twice a week | Deep watering | Adjust based on weather conditions |
| 5+ | Once a week | Deep watering | Monitor soil moisture and adjust as needed |
Common Issues and Troubleshooting Box Elder Seedlings
So, you’ve got some box elder seedlings going, but things aren’t exactly smooth sailing? Don’t worry, it happens. Let’s look at some common problems and how to fix them. Sometimes it’s the soil, sometimes it’s pests, and sometimes it’s just plain bad luck. But with a little know-how, you can usually get your little trees back on track.
Overwatering and Poor Drainage
One of the biggest issues with box elder seedlings is overwatering. These guys don’t like sitting in soggy soil. If the leaves start turning yellow or look droopy even when the soil is wet, that’s a red flag.
- Make sure your pots have drainage holes.
- Use a well-draining potting mix.
- Let the top inch of soil dry out before watering again.
If you’re planting directly in the ground, consider amending heavy clay soils with compost or other organic matter to improve drainage. Raised beds can also be a good solution in areas with poor drainage.
Pests and Diseases
Even small seedlings can attract pests. Keep an eye out for aphids, spider mites, and other tiny critters. Also, fungal diseases can pop up, especially in humid conditions. Addressing rootbound conditions is also important for the overall health of the tree.
- Inspect seedlings regularly for signs of pests or disease.
- Use insecticidal soap or neem oil to control pests.
- Ensure good air circulation to prevent fungal problems.
Nutrient Deficiencies
Seedlings need the right nutrients to grow strong. If the leaves are pale or growth is stunted, it could be a nutrient deficiency. A balanced, slow-release fertilizer can help. Here’s a simple guide:
| Deficiency | Symptoms | Solution |
| Nitrogen | Yellowing of older leaves | Apply nitrogen-rich fertilizer |
| Phosphorus | Stunted growth, purple leaves | Apply phosphorus-rich fertilizer |
| Potassium | Scorched leaf edges | Apply potassium-rich fertilizer |
Transplant Shock
Transplanting can be tough on seedlings. They might wilt or drop some leaves. To minimize transplant shock:
- Water the seedling well before transplanting.
- Handle the roots gently.
- Choose a cloudy day for transplanting.
- Water thoroughly after transplanting.
Poor Germination
Sometimes, seeds just don’t sprout. This could be due to several factors, including old seeds, improper stratification, or poor soil conditions. To improve germination rates, make sure to use fresh seeds, follow the recommended stratification process, and provide well-draining soil. Ensuring proper cherry tree pruning can also help with the overall health of the tree, indirectly affecting seed quality.
Having trouble with your young box elder trees? Don’t worry, many people do! We’ve put together a super helpful guide on our website that covers all the common problems and how to fix them. You’ll find easy tips to keep your seedlings healthy and strong. Check out our full guide for all the answers you need!
Frequently Asked Questions
Where do box elder trees usually grow best?
Box elder trees are quite tough and can grow in many different places, even in cities where other trees might struggle. They don’t mind different kinds of soil or weather.
How do I know when box elder seeds are ready to pick?
You can tell box elder seeds are ready when the winged parts, called samaras, turn a light brown color and feel dry. They usually hang on the tree in bunches.
Should I plant box elder seeds in the fall or spring?
Yes, it’s best to plant box elder seeds in the fall. This lets them go through a natural cold period over winter, which helps them sprout in the spring.
What’s the best way to sow box elder seeds?
You can gently rake the soil to make it smooth, then sprinkle the seeds on top. Cover them with about a quarter-inch of soil to keep them safe.
How much water do young box elder trees need?
Keep the soil damp but not soaking wet. Young box elder trees need about 1-2 inches of water each week, especially when it’s dry.
When is the best time to prune a box elder tree?
You can prune your box elder in late winter or early spring. Focus on cutting off any dead or broken branches to help the tree stay healthy.
Can I get syrup from a box elder tree like from a maple?
Box elder trees can be tapped for their sap in late winter or early spring, when the weather goes from freezing to thawing. You can use the sap to make syrup.
What are some good things about box elder trees?
Box elder trees grow quickly and help stop soil from washing away. They also provide food and shelter for animals and can handle city life well.